
First, shingle construction technology
1 Construction process of cedar shingles
Construction of cornice sprinkling board→Construction along the water→Construction of hanging tile→Roof tile construction→Joint construction→check
2 Installation guide of shingle roof
2.1 Foundation setting out
After receiving the roof and preparing for construction, the setting out along the water strip shall be carried out first. According to the requirements of the drawing, the first highest point of the cornice is selected as the reference height, and this point is taken as the reference point of the cornice height, then the infrared level is used for leveling and setting out, and the cornice height is maintained at the same level through measurement. This effectively solves the visual effect caused by the inconsistency of cornice height. The specific method is shown in the figure:

① Starting from the cornice S1, level it with infrared ray, take the highest point as the datum point, level it from east to west, and determine the height of the South cornice along the water strip.
② Starting from S2, level with infrared ray, take the highest point as the datum point, level from east to west, determine the height of the middle staggered platform along the water bar, and connect with S1 point with white line.
③ Starting from the cornice S3, use infrared ray to level, take the highest point as the datum point, level from east to west, and determine the height of the North cornice along the water bar.
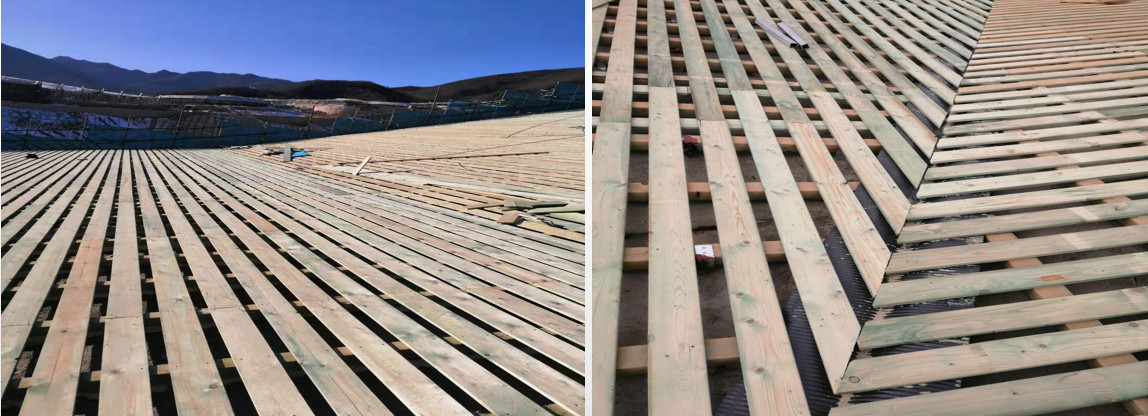
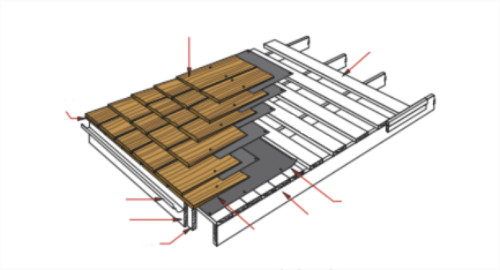
2.2.Counter batten of along water strip and tile hanging strip
①The rain-water lath specification not be less than 50 mm * 50 (H). The MM fumigation anti-corrosion wood downstream strip shall be used. Firstly, the position line of downstream strip shall be popped on the roof according to the spacing requirement of 610mm. The 2mm thick galvanized steel connector shall be used, and 3 pieces shall be used according to the spacing requirement of 900mm Ø 4.5 * 35mm steel nails are fixed on the nail layer, and then the m10nylon expansion bolt is used to pass through the downstream bar for reinforcement treatment. The reinforcement spacing is about 1200mm along the direction of the downstream bar for post planting, and the downstream bar shall be adjusted horizontally. The downstream bar shall be graded evenly, and the nails shall be laid flat and firm. If due to structural problems, the downstream strip cannot be installed close to the structure, it can be filled with Styrofoam between the downstream strip and the structural layer gap.


②100 * 19 (H) mm fumigation anti-corrosion wood (moisture content 20%, dosage of anti-corrosion wood 7.08kg/㎡, density 400-500kg /㎡) is used for tile hanging strip. The first step is about 50 mm away from the cornice, and the second step is about 60 mm away from the ridge line. Two 304 stainless steel screws Ø4.2 * 35mm shall be used to fix the tile hanging strip on the downstream strip. The tile hanging strip shall be evenly graded, and the nails shall be laid flat and firm, so as to ensure that the tile surface is flat, the row and column are neat, the overlap is tight, and the cornice is straight. Finally, the guy wire inspection shall be conducted.

2.3 Construction of waterproof and breathable membrane
After the installation of the tile hanging strip, check that there is no sharp object protruding from the tile hanging strip on the roof. After the inspection, lay the waterproof and breathable membrane. The waterproof and breathable membrane shall be laid along the direction of the water strip to the left and right, and the lap joint shall not be less than 50 mm. It shall be laid from the bottom to the top, and the lap joint shall be 50 mm. While laying the waterproof and breathable membrane, the roof tile shall be installed, and the waterproof and breathable membrane shall be compacted.
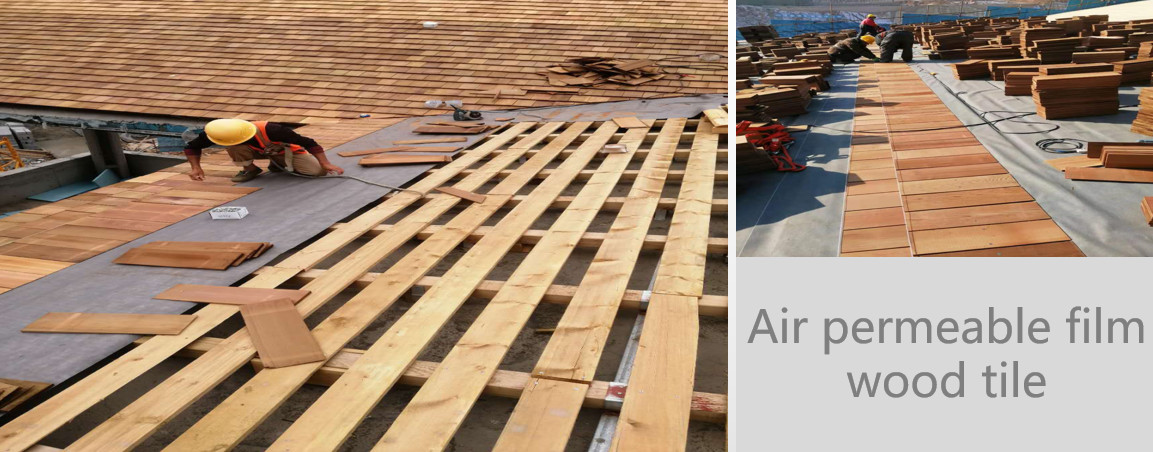
Polypropylene and polyphenylene are used as waterproof and breathable membrane, and PE membrane is used in the middle. The tensile property is n / 50mm, longitudinal ≥ 180, transverse ≥ 150, elongation% at maximum force: transverse and longitudinal ≥ 10, water permeability is 1000mm, and there is no leakage in water column for 2h.
2.4 Hanging tile construction
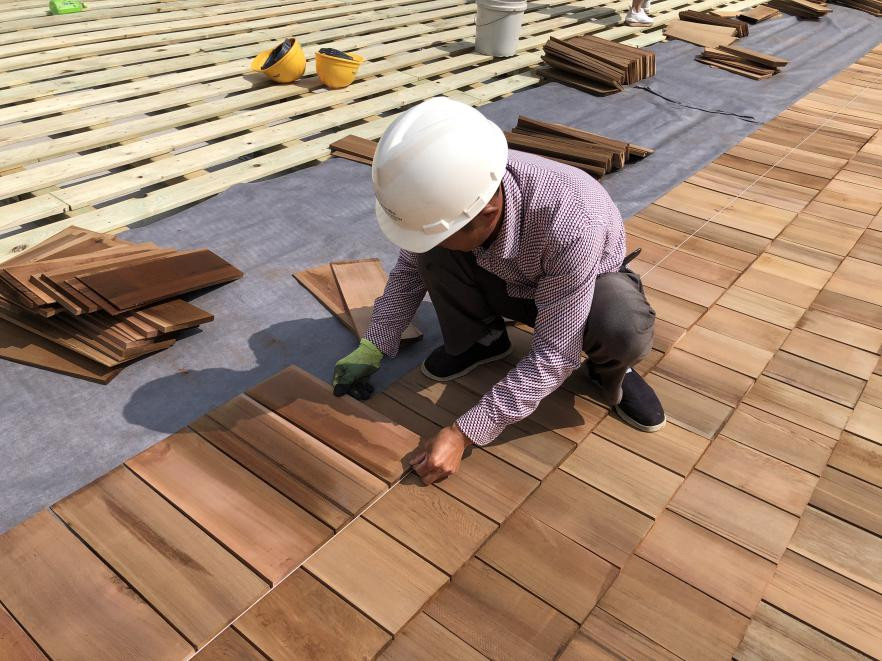
For tile hanging construction, self tapping screws are used to fix the tile hanging on the tile hanging strip according to the tile hole position, two nails are used for each piece, and 304 stainless steel screws Ø 4.2 * 35mm are used for tile hanging nails. The sequence of hanging tile is from bottom to top. The cover tile is installed after the installation of the bottom row tile. The upper tile overlaps with the lower tile by about 248mm. The tile overlaps with the tile tightly without unevenness or looseness. In case of unevenness or looseness, the tile needs to be repaired or replaced in time. Each row of tile eaves should be in the same straight line. To ensure that the edge is in the same line, the cornice node should be treated perfectly.
The upper row should cover the gap between the two blocks in the lower row, and the position of the nail should be able to cover the second row of shingles. Therefore, the first row is usually double-layer. A certain distance from the top of the first row is staggered in the installation of the second row. The second row should cover the gap and nail hole of the first row of upper shingles. Shingles and waterproofing are carried out at the same time, and so on. That is, a layer of shingles, a layer of waterproof, so that double waterproof will not cause leakage phenomenon.
2.5. Installation of Ridge tile
The ridge tile is installed in pairs. First, fix the tile hanging strip on the vertical strip with self tapping screws, adjust the level, and make sure there is no fluctuation. At the lap joint of the main tile and the ridge tile, lay the self-adhesive waterproof coiled material along the direction of the ridge. The coiled material is tightly sealed with the main tile of the roof, and then fix the ridge tile on both sides of the tile hanging strip with self tapping screws. The ridge tile should be covered correctly and evenly spaced.


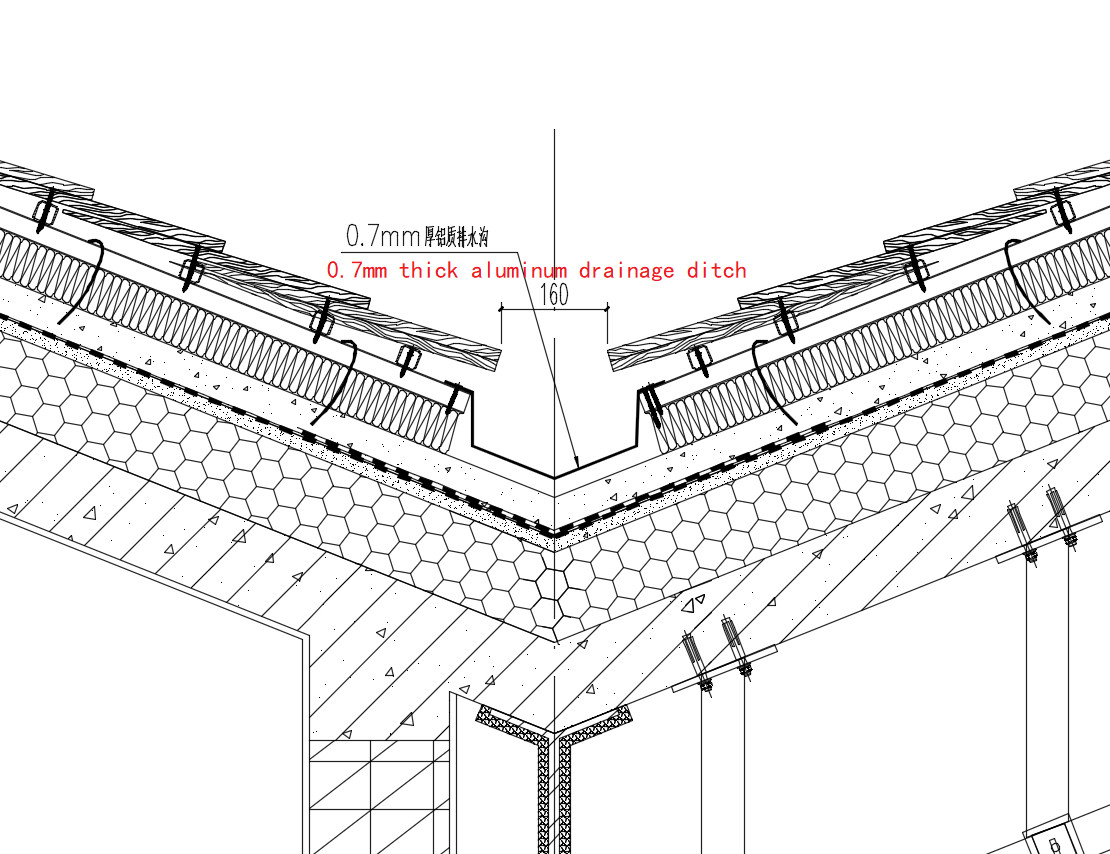
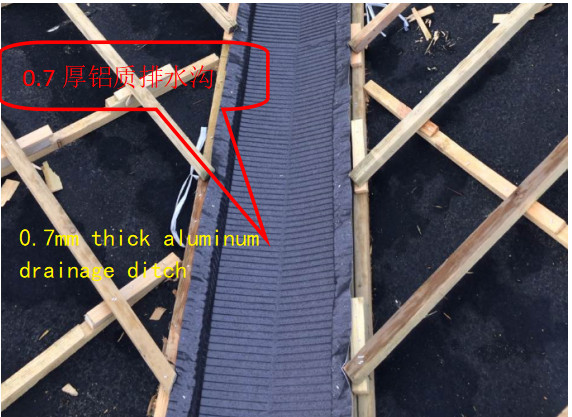
2.6 Inclined gutter
The inclined gutter (i.e. sewer) is installed with butt joints. Aluminum drainage ditch Board shall be installed at the inclined gutter position first, and then the roof tile shall be installed. The inclined gutter line of each slope shall be snapped. The cutting line shall be the center line of the gutter, and the cutting joint of the inclined gutter shall be treated with glue. Some short drainage ditches are installed by butt joint splicing, and the butt joint is finally sealed with sealant. When one section of drain board is not long enough, multi section splicing method shall be adopted, and the installation shall start from the bottom. When splicing, the upper section shall be pressed on the lower section of drainage ditch plate, and the overlap of the two sections shall not be less than 5cm.
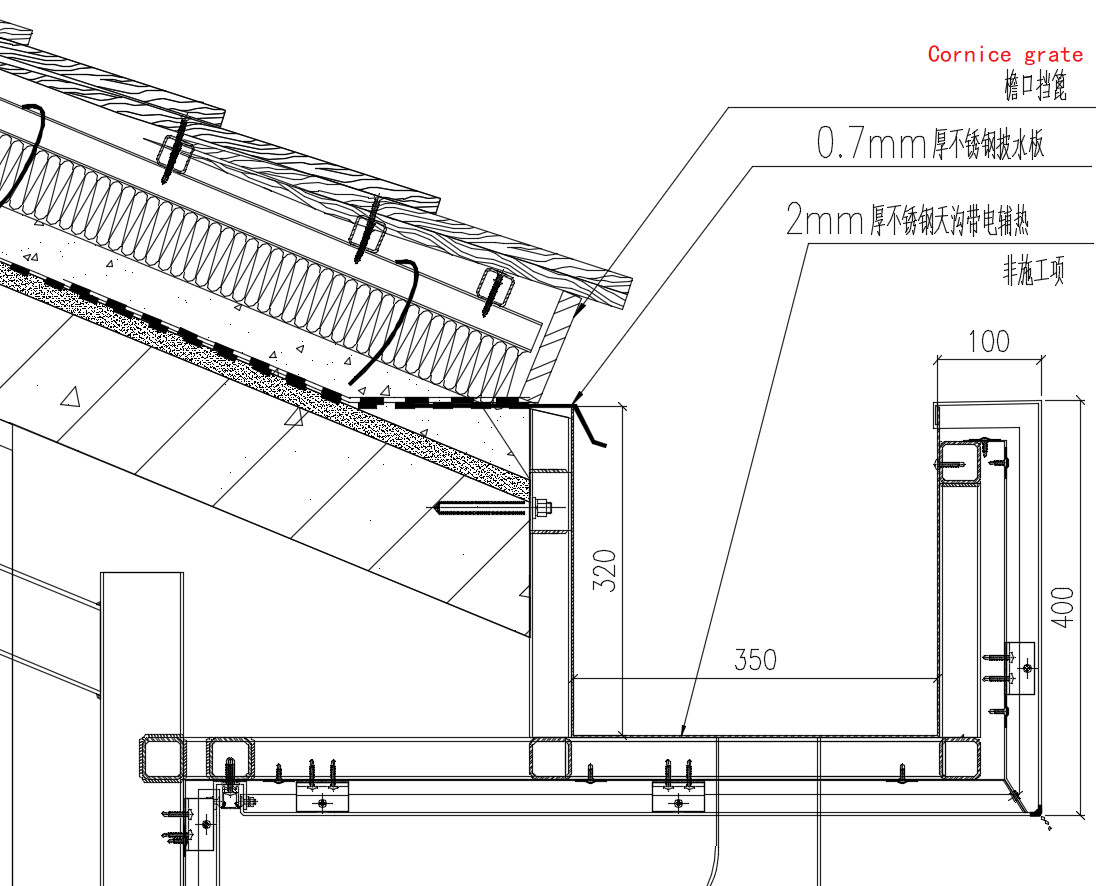
2.7. Installation of eaves barrier grate
Installation of cornice grate: the cornice grate is made of customized wood board with the same material as the wood tile, which is processed and installed according to the actual situation of the site. It is fixed on the hanging tile strip with the screw spacing of 300 mm. The butt joint between the boards is seamless and flat.
Post time: Jun-21-2021

